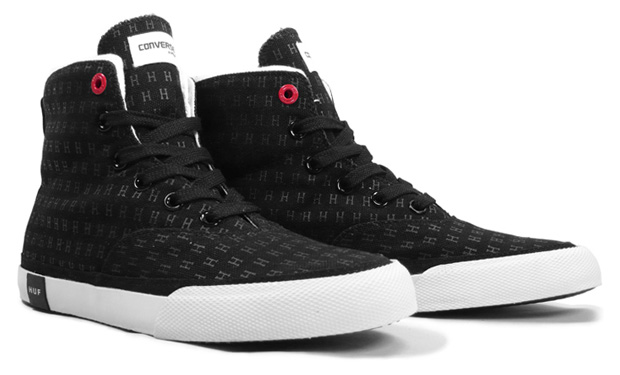
I already have a very nice Nikon D40 DSLR which takes great photographs. However, without proper lighting and backdrop, the photos still wont look like "professional" quality. If you've ever wondered how photos of products with a smooth, bright white background like these pictures are taken...
...It's with a light tent! A light tent is typically a box large enough to hold small-medium sized objects for photographing. It is covered by fabric on the top and three sides, with one side left open. The back wall of the tent can be covered in fabric or paper, and curves smoothly into the floor to create a seamless backdrop with no edges or creases. The tent is the lit anywhere from one to all sides to get the lighting effect desired.
On amazon and photography shops, light tents can cost a pretty penny, sometimes up to a couple hundred dollars. This is not exactly a feasible option for someone starting a small online business! I decided, after a bit of research, to try my hand at making my own light tent for just a few dollars and about 45 minutes of construction time. Turns out it was really easy and the results were awesome!
The tutorial I used can be found here, but here's a basic rundown of the supplies and cost:
You will need
- a large, square-ish box. I got mine from work so that was free.
- 2 yards of white muslin fabric from Joann's or another fabric store. this was $1.25 a yard so only $2.50!
-2 large sheets of white bristol board, found near the yellow bristol drawing pads in the craft store- mine was a dollar a sheet. 2$.
-masking or packing tape, a ruler, a sharpie, exacto knife and/or scissors- assuming you already have these on hand, free.
- lighting fixture. I bought a clamp-on work light at home depot for $8.50. it's sturdy and works perfectly for what I need it for.
-light bulbs. I bought a pack of 4 100 watt "daylight" (provides bright white, rather than yellow light) bulbs for $8, also at home depot. 4 bulbs should last me years!
Total cost: 21$. Note that you can also purchase fewer bulbs, and if you already have an adjustable desk lamp (or any small lamp that can be moved around easily) you can omit the work light cost!
I'm really happy with how my light tent turned out. The quality is great! Here are a few example from when I was testing it out:
And here's the first product photo I took. It really helps the image appear clean and bright!
I'm really looking forward to continuing to use my light tent as I build up my shop. If you're interested in photographing products for a store or otherwise I encourage you to consider making your own light tent before you splurge on something you find online!
Have a lovely week!
Love, Em


No comments:
Post a Comment